In the current digital marketplace, it’s often observed that businesses seek a silver bullet for customer engagement and education. While many strategies exist, few possess the direct impact and scalability of a well-executed video tutorial. The numbers are compelling; studies consistently show that consumers are significantly more likely to use a product or service after watching an explanatory video. This isn’t just about marketing; it’s about fundamentally improving the customer experience, reducing the burden on support teams, and building a library of assets that works for your business around the clock.
However, a perception exists that creating video content is the exclusive domain of companies with large budgets and dedicated production teams. This is a profound misconception. The true strategic imperative behind video tutorials is not the expense of the camera, but the clarity of the message. They are a critical business asset, capable of scaling your customer support, streamlining user onboarding for new clients, and even persuading potential customers who are on the fence. In my experience, a tutorial that clearly solves a problem using basic tools will always outperform a beautifully shot but confusing video.
This guide is designed to take you on a complete journey, demystifying the entire production process. We will move systematically from the initial blueprint of pre-production, through the technical execution of filming, into the nuanced craft of editing, and finally to the strategic deployment and analysis of your finished work. Consider this your comprehensive manual for creating effective video tutorials that deliver tangible results.
Phase 1: Pre-Production – The Blueprint for a Successful Tutorial
 1")
Every great film, from a Hollywood blockbuster to a 3-minute software tutorial, is built not on set, but on paper. The pre-production phase is where you win the battle. It’s the most critical stage because it determines what you will say, how you will show it, and who you are trying to reach. Rushing this stage is the single most common mistake businesses make, and it leads to reshoots, confusing content, and wasted resources. A competent plan is the foundation of an entertaining and innovative video.
A. Identifying High-Impact Tutorial Topics
Before you ever think about a microphone or camera, you must decide what your video will be about. Creating a video just for the sake of it is pointless. Your goal is to create a resource that solves a real problem for your audience. A high-impact tutorial is one that a large number of your customers or potential customers are actively searching for an answer to. The question is, how do you find these golden topics?
Analyze Customer Support Tickets and Frequently Asked Questions (FAQs). Your support team is sitting on a goldmine of video ideas. What are the top 5 or 10 questions your team answers every single day? If customers repeatedly call or email asking how to perform a specific function or troubleshoot a common issue, that is a perfect candidate for a video tutorial. Creating a video for each of these common problems not only helps your customers but also frees up your support staff to handle more complex issues. For example, if you sell accounting software and customers constantly ask how to generate a year-end report, a video titled “How to Easily Create Your Year-End Report” will be incredibly valuable.
Use Keyword Research Tools. To reach new customers, you need to understand what they’re searching for online. Tools like Ahrefs or SEMrush, and even free tools like Google Keyword Planner, can show you the exact phrases people are typing into search engines. Start by typing in your product category, like “small business CRM,” and look for questions. You will likely find searches like “how to import contacts into a CRM” or “best way to track sales leads.” Each of these is a potential tutorial topic that can attract viewers who may not know about your specific brand but are looking for a solution you provide. This approach aligns your content with existing demand.
Survey Your Existing Customers or Social Media Audience. Sometimes, the most direct approach is the best. Simply ask your audience what they want to learn. You can send out an email newsletter with a simple one-question poll or post on your social media channels. You might ask, “What’s the one feature in our product you wish you understood better?” or “What’s the biggest challenge you’re facing in [your industry] right now?” The answers will not only give you video ideas but also make your audience feel heard and valued.
Address Common User Friction Points. Think about the journey a new customer takes with your product or service. Where do they get stuck? Where do they slow down? This is known as a “friction point.” Maybe many users sign up for a free trial but never set up their first project. A video tutorial on “5 Steps to Set Up Your First Project in Under 10 Minutes” could dramatically improve your user onboarding and conversion rates. Mapping the customer journey and identifying these hurdles provides a clear roadmap for your first set of tutorials.
B. How to Script a Tutorial Video for Maximum Clarity and Engagement
Once you have your topic, you must resist the urge to just hit “record” and start talking. A script is your guide. It ensures you don’t forget crucial steps, ramble, or use confusing language. From a production standpoint, a script saves immense time in editing because you have a tight, focused narrative from the start.
The Three-Act Structure. Every good story has a beginning, a middle, and an end. A tutorial is a story about solving a problem.
- Act 1: The Introduction (The Problem). In the first 10-15 seconds, you must hook the viewer. State the problem you are going to solve and promise them the result. For example: “Are you struggling to get your photos to look sharp and professional? In the next five minutes, I’m going to show you three simple editing tricks that will make your images pop.” This tells the viewer exactly what they will get and why they should keep watching.
- Act 2: The Middle (The Step-by-Step Solution). This is the main part of your tutorial. Go through the process one step at a time. Number your steps if possible (e.g., “Step 1: Open the Levels panel…”). Explain not just what to do, but why you are doing it. This builds understanding and competence. For instance, instead of just saying “click this button,” say “click the ‘Export’ button to save your work in a high-quality format.”
- Act 3: The Conclusion (The Result and Call to Action). Briefly summarize what you’ve taught and show the final result. This provides a satisfying end to the lesson. Then, you must include a Call to Action (CTA). What do you want the viewer to do next? This could be “Subscribe to our channel for more tips,” “Visit our website to start a free trial,” or “Leave a comment below if you have any questions.” A video without a CTA is a missed opportunity.
Writing for the Spoken Word. A script should not sound like a technical manual. It should sound like a helpful expert calmly guiding someone. Use short, simple sentences. Read your script out loud. If you stumble over a sentence or it sounds unnatural, rewrite it until it flows smoothly. Avoid jargon where possible. If you must use a technical term, explain it immediately.
Detailing Visual Cues (The Two-Column Script). A professional video script is more than just words. It includes directions for what should be on screen. The best way to format this is with a two-column table.
| Visuals (On-Screen Action) | Audio (Voiceover / Dialogue) |
| Main title graphic: “How to Create a Year-End Report” | (Upbeat, introductory music fades in and then fades to background) “Hello, and welcome. Today we’re going to solve…” |
| Screen recording: Cursor moves to the “Reports” tab and clicks it. The clicked area is zoomed in. | “First, you’ll want to navigate to the ‘Reports’ tab on the left-hand side of your dashboard.” |
| Talking head video: Speaker is smiling at the camera. A lower-third graphic shows their name. | “And just like that, you have a professional report ready for your year-end meeting. For more tutorials like this, be sure to subscribe to our channel.” |
This format ensures that your visuals and your words are perfectly synchronized, making the editing process vastly more efficient.
C. Storyboarding and Shot Listing: Visualizing the Final Product
A storyboard is a comic book version of your video. It doesn’t have to be a work of art. Simple stick figures or a series of screenshots are perfectly fine. The purpose of a storyboard is to help you think visually. For each major point in your script, you’ll create a small drawing or “panel” that shows what the viewer will see.
This process helps you identify potential problems before you start filming. You might realize that you need a close-up shot to show a specific button on the screen or that you need a graphic to explain a difficult concept. It also helps you plan for B-roll. B-roll is any supplemental footage you use to cut away from your main shot (the A-roll). For a software tutorial, your A-roll is the screen recording. Your B-roll might be a quick shot of a person smiling while using the computer, a close-up of their hands on the keyboard, or an animated graphic that illustrates a point. B-roll makes your video more dynamic and professional, preventing it from becoming a monotonous, single-shot recording.
A shot list is a simple checklist of every single shot you need to capture. For a tutorial, this might include:
- Talking head intro
- Screen recording – Step 1
- Screen recording – Step 2
- Close-up of final result
- Talking head outro
Having this checklist ensures you don’t forget anything during the production phase, saving you from having to set up all your equipment again for one missed shot.
Phase 2: Production – Capturing High-Quality Footage
 2")
With a solid plan in hand, you are ready to enter the production phase. This is where you capture all the visual and audio elements for your video. The quality of your production has a direct impact on how credible your business appears. Poor audio or shaky video can make viewers click away, no matter how good your information is. The good news is that you don’t need a Hollywood studio to achieve professional results.
A. Essential Equipment: A Tiered Approach
The equipment you need depends on your budget and your goals. It is far better to master basic equipment than to be overwhelmed by expensive gear you don’t know how to use. Here is a breakdown of what you might consider at different levels.
Budget-Friendly / Free:
- Screen Recording: Both macOS and Windows have free, built-in screen recorders. On Mac, it’s part of the Screenshot tool (Shift-Command-5). On Windows, it’s the Xbox Game Bar (Windows key + G). While basic, they are more than capable of capturing your screen.
- Video: Your smartphone. Modern smartphones shoot incredibly high-quality video, often better than webcams. Prop it up on a stack of books in front of a window for good lighting.
- Audio: The microphone on your smartphone’s headphones. If you plug in a pair of wired earbuds, the small microphone that hangs near your mouth is a huge improvement over your computer’s built-in mic. It reduces echo and gets the microphone closer to the source: your voice.
Mid-Range (Prosumer): This is the sweet spot for most businesses.
- Screen Recording: A dedicated software like Camtasia or ScreenFlow (Mac only). These tools offer more features, like the ability to zoom in on parts of the screen, highlight your cursor, and do basic editing all in one place. OBS Studio is a powerful free alternative, though it has a steeper learning curve.
- Video: A high-quality webcam like the Logitech C920. This provides a crisp 1080p image and is simple to use.
- Audio: A USB microphone. This is arguably the most important upgrade you can make. A microphone like the Blue Yeti or Rode NT-USB plugs directly into your computer and will make your voice sound rich and clear. Good audio builds trust with your audience.
- Lighting: A simple LED ring light. These are inexpensive and provide soft, flattering light for your face, eliminating harsh shadows.
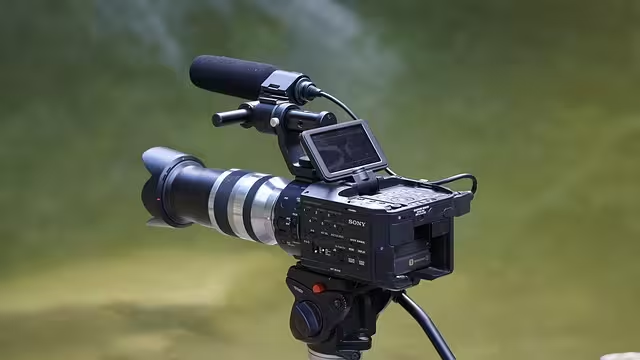
Professional Grade:
- Video: A DSLR or Mirrorless camera. These cameras offer superior image quality, interchangeable lenses, and the ability to create a blurry background (known as “bokeh”) that makes your video look very cinematic.
- Audio: An XLR microphone like the Shure SM7B or Rode Procaster connected to an audio interface. This setup provides the absolute best audio quality, similar to what you’d hear on a professional podcast or radio show.
- Lighting: A three-point lighting setup. This involves a “key light” (main light), a “fill light” (to fill in shadows), and a “backlight” (to separate you from the background). This gives you complete control over the look and feel of your shot.
B. Choosing the Right Video Tutorial Format
Not all tutorials are the same. The format you choose should match the information you’re presenting.
- Screencasts: This is the most common format for software and website tutorials. You are simply recording your computer screen as you walk through a process. It’s direct, clear, and easy for the viewer to follow along.
- Talking Head: This is a video of a person talking directly to the camera. This format is excellent for introductions, conclusions, and explaining concepts. It builds a human connection and establishes you or your team member as an expert. Seeing a friendly face builds trust.
- Animated Tutorials: For complex or abstract ideas that are hard to show on screen, animation can be a powerful tool. Tools like Vyond or Powtoon allow you to create simple animated videos without needing to be an artist. This format is great for explaining the “why” behind a process.
- The Hybrid Model: From a cinematographic perspective, the most engaging tutorials often use a hybrid approach. You might start with a talking head intro to welcome the viewer, then transition to a screencast for the step-by-step instructions, and cut back to the talking head for the conclusion. This variation keeps the viewer’s attention.
C. Technical Best Practices for Recording
- Screen Recording: Before you hit record, prepare your screen. Close all unnecessary tabs and applications. Turn off notifications to avoid distracting pop-ups. Clean up your desktop so it doesn’t look cluttered. When you are recording, move your mouse cursor slowly and deliberately. If your software allows it, add a highlight to your cursor to make it easier for viewers to follow. Always record in a high resolution, at least 1920×1080 pixels (1080p), to ensure the text on your screen is sharp and readable.
- Audio Recording: Audio is more important than video. Viewers will tolerate a slightly blurry image, but they will immediately click away if the audio is full of echo, background noise, or is hard to hear. Find the quietest room you can. A closet full of clothes is actually a great makeshift recording booth because the fabric absorbs sound and reduces echo. Get your microphone close to your mouth (about 6-8 inches away is a good rule of thumb). Use a pop filter, which is a screen that goes in front of the mic, to soften harsh “p” and “b” sounds. Speak clearly and at a steady pace.
Phase 3: Post-Production – Assembling and Polishing Your Tutorial
 3")
Post-production, or editing, is where the magic happens. This is where you take your raw footage and assemble it into a polished, professional, and easy-to-follow video. Good editing can make a simple recording feel dynamic and engaging.
A. Selecting the Best Video Editing Software for Your Needs
- Free Options: You don’t need to spend money to get a powerful editor. DaVinci Resolve offers a free version that is used on Hollywood films. It’s incredibly powerful but has a significant learning curve. For simpler needs, OpenShot is a great open-source option, and iMovie (on Mac) or Clipchamp (on Windows) are very user-friendly for beginners.
- Subscription-Based (Industry Standard): The two main professional applications are Adobe Premiere Pro and Final Cut Pro (Mac only). These offer every feature you could possibly need and are the standard in the creative industry. They have a monthly or one-time cost.
- Specialty/User-Friendly: For tutorial creators, Camtasia is often the top choice because its screen recording and editing tools are seamlessly integrated. A newer, innovative tool is Descript, which allows you to edit video by simply editing the text of its automatically generated transcript. This can be an incredibly fast way to create a rough cut of your video.
B. The Editing Workflow: From Raw Footage to Final Cut
A structured workflow will save you hours of frustration.
- Organize Your Files: Before you even open your editing software, create a main folder for your project. Inside that folder, create sub-folders for “Video” (your A-roll and B-roll), “Audio” (your voiceover and music), and “Graphics” (your logo, lower thirds, etc.). This organization is a hallmark of professional production.
- Create the Rough Cut: Import all your footage into the software. Lay down your main audio track (your voiceover) first. Then, sync your video clips to match the voiceover. Go through and cut out all the mistakes, long pauses, and “ums” and “ahs.” Don’t worry about making it pretty yet; just get the core content and timing right.
- Add B-Roll and Graphics: Once your main story is in place, cover the “jump cuts” (the jarring transitions where you cut out a mistake) with B-roll. When you mention a specific step, add a text overlay or a callout arrow to draw attention to it on the screen. Add an intro with your company logo and an outro with your call to action.
- Color Correction and Audio Mixing: Make sure all your video clips have a consistent look. You can use simple color correction tools to adjust brightness, contrast, and saturation. Most importantly, mix your audio. Your voiceover should be the loudest and clearest element. If you add background music, make sure it’s quiet enough that it doesn’t compete with your voice. The volume of background music should be set very low, just enough to add some energy without being a distraction.
- Export: Export your final video in a high-quality format. For the web, an MP4 file with the H.264 codec is the standard. Choose the 1080p preset for a good balance of quality and file size.
Phase 4: Distribution and Optimization – Ensuring Your Tutorial is Seen
Creating a great video is only half the battle. If no one sees it, it has no impact. You need a smart strategy for hosting, optimizing, and promoting your content.
A. Choosing the Right Hosting Platform
- YouTube/PeerTube: YouTube is the second largest search engine in the world. Hosting your tutorials here is the best strategy for discoverability and reaching the widest possible audience. Its SEO potential is massive. PeerTube is a decentralized, open-source alternative for those who prefer not to use a major corporate platform.
- Vimeo/Wistia: These platforms are built for businesses. They offer an ad-free viewing experience, which looks more professional when you embed videos on your website. They also provide much more detailed analytics. Wistia, in particular, offers tools like in-video calls to action and email gates. The trade-off is that they have very little public discoverability compared to YouTube. A common strategy is to host public, top-of-funnel tutorials on YouTube to attract viewers, and host specific, sales-or-support-focused videos on Wistia to embed on your site.
B. Video SEO: Optimizing for Search Engines
Video Search Engine Optimization (SEO) is the art and science of making your videos discoverable on platforms like YouTube and Google.
- Keyword-Rich Titles and Descriptions: Your title should be clear, compelling, and include the main keyword phrase someone would search for. A good title is “How to Create a Pivot Table in Excel” not “Excel Fun.” In your description, write a few sentences explaining what the video is about, naturally including your main keyword and a few related ones. You can also include a link to your website and timestamps for different sections of the video.
- Compelling Thumbnails: The thumbnail is the small preview image for your video. Along with the title, it’s the most important factor in whether someone clicks on your video. A good thumbnail is high-contrast, easy to read even when small, and often includes a person’s face showing emotion or a clear visual of the video’s end result.
- Tags and Hashtags: Tags are hidden keywords that help YouTube’s algorithm understand your video’s topic. Use a mix of broad tags (“Excel”) and specific tags (“Excel pivot table tutorial for beginners”).
- Transcripts and Closed Captions (SRT files): This is a massively underrated SEO tactic. Uploading a full transcript or a captions file (in .SRT format) allows Google and YouTube to “read” every word in your video. This gives them a huge amount of data to understand your content, which can significantly boost your search rankings. It also makes your video accessible to a wider audience.
C. Promoting Your Video Tutorial
- Embed it: Place your video in the most logical places on your own website. If you have a tutorial on a specific feature, embed it on that feature’s page. Embed tutorials in relevant blog posts and help-desk articles.
- Share it: Announce your new video to your email list and share it across all your social media channels.
- Use it: Empower your sales and support teams to use the videos. They can send a link to a tutorial to a potential customer who has a question or to a current customer who needs help.
Measuring Success: What Analytics Should You Monitor?
The beauty of digital video is that you can track everything. Looking at the data tells you what’s working and what isn’t.
- Audience Retention/Watch Time: This is the most important metric. It shows you a graph of what percentage of your audience is still watching at any given point in your video. If you see a big drop-off in the first 15 seconds, your introduction isn’t compelling enough. If you see a dip in the middle, that section might be confusing or boring. Your goal is to keep this line as flat and high as possible.
- Click-Through Rate (CTR): This is the percentage of people who saw your video’s thumbnail and title (an “impression”) and chose to click on it. A low CTR (typically under 2-3%) suggests your title or thumbnail isn’t enticing enough.
- Engagement: Likes, shares, and especially comments are signs that your video is resonating with people. Comments, in particular, are valuable feedback.
- Conversion Rate: If your video’s CTA is to “Start a free trial,” you can track how many people who watched the video actually went on to do that. This connects your video efforts directly to business results.
Frequently Asked Questions (FAQ)
Q1: How long should a video tutorial be?
The ideal length is as long as it needs to be to solve the specific problem, and not one second longer. However, for most single-topic tutorials, the sweet spot is generally between 3 and 7 minutes. This is long enough to cover a topic in detail but short enough to hold a viewer’s attention. If you have a very complex subject, it is far better to break it down into a playlist of several shorter, focused videos rather than creating one 45-minute marathon video.
Q2: How do you make a tutorial video interesting?
Interest comes from clarity and variety. Start with a crystal-clear script and high-quality audio—if viewers can’t understand you, they won’t be interested. Use crisp editing to remove pauses and mistakes, keeping the pace moving. Incorporate B-roll footage, text callouts, and zoom-ins to provide visual variety and break up the monotony of a single screen recording. Finally, inject personality. Whether it’s a talking head segment or just your voiceover, an enthusiastic and engaging tone makes a world of difference.
Q3: Can I create a video tutorial for free?
Absolutely. The primary investment will be your time, not your money. You can use OBS Studio (a powerful, free screen recorder), your smartphone’s camera for video segments, and DaVinci Resolve (a free, professional-grade editor). By recording in a quiet space and using your phone’s earbud microphone, you can achieve surprisingly high-quality audio. The tools are available; success depends on applying the principles of good planning and clear communication.
Conclusion
In the final analysis, creating effective video tutorials is not about having the most expensive equipment. It is a systematic process rooted in clear communication and a genuine desire to help your audience. By moving deliberately through the phases of pre-production, production, post-production, and distribution, any business can build a library of valuable video assets. These tutorials will work tirelessly to reduce your support costs, increase the satisfaction and competence of your customers, and ultimately, improve your bottom line. The path begins not with a large budget, but with a commitment to a competent process. Your first step is simple: identify one common customer question, and begin to script the answer.